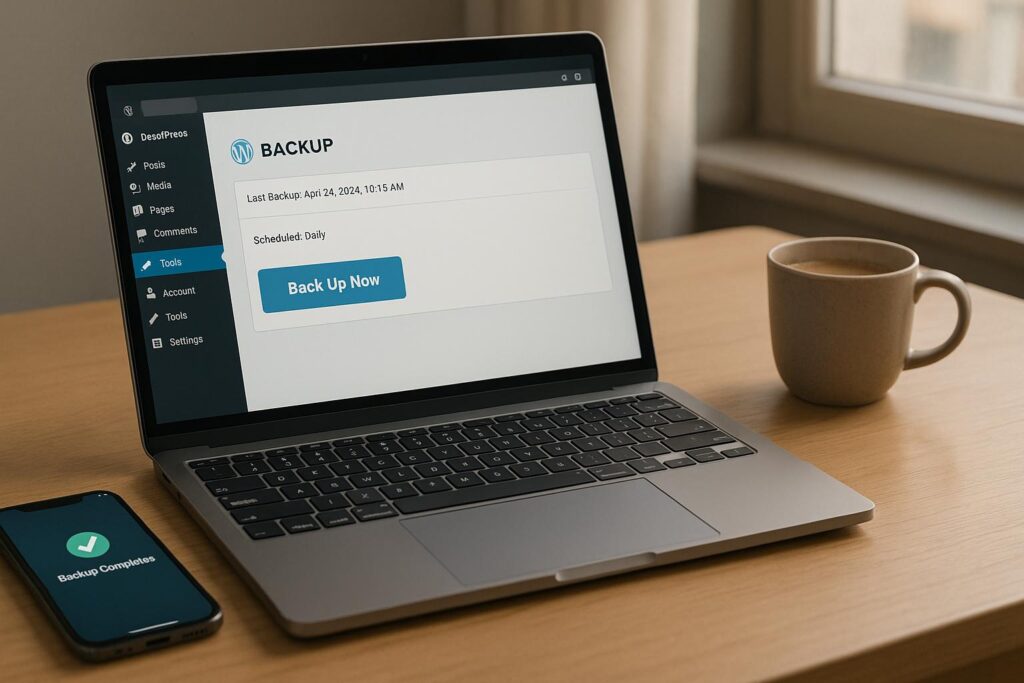
Did you know that 54% of WordPress site owners experience data loss, yet only 10% back up daily? If you’re not automating your backups, you’re putting your hard work at risk. Here’s how to set up automatic WordPress backups in five simple steps:
- Know What to Back Up: Ensure both your MySQL database (posts, comments, configurations) and WordPress files (themes, plugins, media) are included in your backups.
- Pick a Backup Plugin: Choose a reliable tool like UpdraftPlus, BackWPup, or Jetpack VaultPress Backup for automated backups.
- Schedule Backups: Automate backups based on your site’s activity – daily for high-traffic sites, weekly for moderate updates, and monthly for static sites.
- Save to Cloud Storage: Store backups offsite using services like Google Drive, Dropbox, or Amazon S3 to avoid losing data if your server fails.
- Test Your Backups: Regularly verify that your backups work by restoring them in a staging environment.
Quick Comparison of Backup Plugins
| Plugin | Key Features | Starting Price |
|---|---|---|
| UpdraftPlus | Automated/manual backups, cloud integration, one-click restore | $70/year |
| BackWPup | Multiple storage options, scheduled backups, easy restoration | $69/year |
| Duplicator Pro | Full backups, scheduled backups, cloud storage, migration wizard | $49.50/year |
| Jetpack VaultPress | Daily and real-time backups, cloud storage | $59.40/year |
| BlogVault | Incremental backups, staging site, long-term storage | $149/year |
Why Automate Backups?
Manual backups are error-prone and time-consuming. Automatic backups save time, reduce stress, and ensure you’re always prepared for unexpected issues like hacking, crashes, or human error. Start protecting your site today with these steps!
How to Set up an Automatic Backup System on WordPress | Updraft Plus
Step 1: Know What to Back Up
Before diving into automated backups, it’s crucial to understand the key components of your WordPress site. A complete backup includes both the MySQL database and the WordPress files.
Parts of Your Site That Need Backup
Your WordPress site has two essential parts that must be backed up to ensure full recovery: the database and the site files.
The WordPress Database is where all your dynamic content and settings live. This includes your posts, pages, comments, and site configurations. Without it, your content and site setup are gone.
"Your WordPress database contains every post, every comment and every link you have on your blog. If your database gets erased or corrupted, you stand to lose everything you have written." – WordPress Developer Resources
WordPress Files form the structure and appearance of your site. These include media uploads, themes, plugins, and configuration files like wp-config.php. Most of these critical files are stored in the wp-content folder, which holds your media library and any customizations. Skipping these files could leave parts of your site unrecoverable [11, 15].
Pro Tip: Always keep at least three backups stored in separate locations. This ensures you have alternatives if one backup fails. It’s also a good idea to create a full backup before making significant changes to your site [11, 15].
By understanding the importance of these components, you’re better equipped to select tools for automating backups.
Problems with Manual Backups
Relying on manual backups can leave your site vulnerable. They’re often inconsistent and prone to errors, which risks losing recent updates or even entire datasets.
Manual backups are also time-consuming, making them impractical for busy website owners. For sites with large amounts of data, the process becomes even more tedious and requires constant upkeep.
"Ultimately, a WordPress backup plugin takes care of the mundane tasks while you focus on what you do best – creating amazing content." – Joella Dunn, Content Writer, Duplicator
Technical errors during manual backups can render them useless when you need them most. Plus, it’s easy to overlook recent changes, leaving your site incomplete in case of recovery.
Now that you know what needs to be backed up and the limitations of manual methods, you’re ready to explore reliable backup plugins to safeguard your WordPress site.
Step 2: Pick a Backup Plugin or Tool
Choosing the right backup plugin is essential to safeguard your WordPress site. Not every plugin offers the reliability or features needed to ensure smooth, automated backups.
What to Look for in a Backup Tool
When evaluating backup plugins, prioritize features that make protecting your site effortless and effective. Here’s what to keep in mind:
- Ease of use: A straightforward interface with clear instructions is key, especially for non-technical users. This minimizes errors during setup and operation.
- Complete backups: The plugin should cover everything – your database, files, themes, plugins, and media uploads – so nothing critical is left out during recovery.
- Automated scheduling: Look for tools that let you schedule backups daily, weekly, or monthly. This ensures your site is regularly backed up without needing manual input.
- Flexible storage options: A good plugin should support both local storage and cloud services like Google Drive, Dropbox, or Amazon S3, giving you multiple ways to store your backups.
- Security: Encryption during storage and transfer is a must to keep your data safe from unauthorized access.
- Incremental backups: By saving only the changes made since the last backup, this feature conserves storage space and reduces backup times.
- Reliable restore options: The ability to quickly test and restore backups is crucial for minimizing downtime if something goes wrong.
Before settling on a plugin, evaluate your specific needs, check compatibility with your hosting setup, and factor in your site’s growth and long-term costs.
Popular Backup Plugins to Consider
Here’s a quick comparison of some of the most trusted WordPress backup plugins:
| Plugin | Key Features | Starting Price |
|---|---|---|
| UpdraftPlus | Automated/manual backups, cloud integration, one-click restore | $70/year |
| BackWPup | Multiple storage options, scheduled backups, easy restoration | $69/year |
| Duplicator Pro | Full backups, scheduled backups, cloud storage, migration wizard | $49.50/year |
| Jetpack VaultPress Backup | Automated daily and real-time backups, cloud storage | $59.40/year |
| BlogVault | Smart incremental backups, staging site, long-term storage | $149/year |
- UpdraftPlus: Known for its simple interface and strong cloud integration, it offers both automated and manual backups, plus a one-click restore option.
- BackWPup: Stands out for its flexibility in storage options and scheduled backups, making restoration hassle-free.
- Duplicator Pro: Ideal for users who frequently migrate sites or set up staging environments, thanks to its full backup and migration features.
- Jetpack VaultPress Backup: Provides daily and real-time backups, perfect for high-traffic sites needing frequent data protection.
- BlogVault: Although on the pricier side, it delivers advanced features like incremental backups, staging environments, and extended storage retention.
Before making your choice, check how often the plugin is updated and read user reviews to ensure it works well with your hosting provider. Some plugins, like Solid Backups NextGen, may not be compatible with hosts like WP Engine, Flywheel, or Pressable. Testing the backup and restore process in a staging environment is also a smart move to ensure everything runs smoothly.
Once you’ve chosen your plugin, the next step is to set up automated backups to keep your site secure.
Step 3: Configure Automatic Backup Schedules
Setting up automated backup schedules takes the hassle out of manually safeguarding your website. Once configured, your plugin will handle backups automatically, ensuring your site stays protected around the clock.
"Automatic backups are my go-to solution for this problem! They work in the background to protect your site without any ongoing effort from you." – Joella Dunn, Writer at Duplicator
How Often to Run Backups
After selecting your backup tool, the next step is deciding how often your website needs to be backed up. The frequency depends on how frequently your site changes. The more updates you make, the more often backups should occur.
"How often to run a complete backup of WordPress site content depends on your site and how frequently it changes – but as a good general rule of thumb, the more often, the better." – InMotion Hosting
Here’s a quick guide to help you decide:
- Static or rarely updated sites: If updates happen once a month or less, monthly backups are usually sufficient. Examples include simple business websites or portfolios.
- Moderately active sites: Websites with weekly updates, such as personal blogs or small business sites, should opt for weekly backups.
- High-activity sites: E-commerce stores, news platforms, or popular blogs that update daily need daily backups. For sites with constant changes, real-time backup solutions might be worth considering.
Also, think about how much data you can afford to lose. If losing even a single day’s worth of data – like orders or comments – would be a major issue, daily backups are a must. Keep in mind that 60% of small businesses that experience data loss shut down within six months. This highlights the importance of frequent, automated backups, especially for WordPress sites, without straining storage or server resources.
Setting Up Your Backup Plugin
Now it’s time to configure your backup plugin. Most plugins make scheduling easy, though the process varies slightly depending on the tool. Typically, you’ll choose a frequency and a start time in the plugin’s settings.
- UpdraftPlus users: Navigate to the Settings tab in your dashboard. Here, you can set separate schedules for files and databases, with options ranging from every 2 hours to monthly backups.
- BackWPup users: Head to the Jobs section and create a new backup job. This plugin uses WP-Cron for scheduling tasks.
When setting up your schedule, keep these tips in mind:
- Run backups during off-peak hours: This minimizes the impact on your site’s performance and ensures smooth operation.
- Exclude unnecessary files: Skip temporary files, cache folders, or other data that doesn’t need to be backed up. This saves storage space and reduces backup times.
- Use remote storage: Store backups off-site – such as in cloud storage – to protect against issues with your hosting provider.
Once everything is configured, your backups will run automatically, keeping your site secure without requiring any ongoing effort.
sbb-itb-f80d703
Step 4: Save Backups to Cloud Storage
Relying solely on your server for backups can be risky. If your hosting provider faces issues like hacking, hardware failure, or outages, you might lose both your website and its backups. Storing backups in the cloud eliminates this single point of failure. Cloud storage not only keeps your backups offsite but also allows access from anywhere and ensures data replication across multiple servers. To stay safe, follow the 3-2-1 rule: maintain three copies of your data, store them on two different types of media, and keep one copy offsite. Next, let’s explore how to connect your backup plugin to cloud storage and secure your data.
Connecting Cloud Storage to Plugins
Many WordPress backup plugins make it simple to connect with cloud storage services. Once you authorize the plugin to access your chosen cloud provider, you can schedule automatic uploads for seamless backup management.
For example, in January 2025, WPBeginner spotlighted UpdraftPlus as a plugin that integrates with Google Drive. The setup involves installing and activating the plugin, adjusting the settings, selecting Google Drive as your storage option, and authorizing access to your Google account. After that, you can schedule automatic backups for both your files and database.
By March 2025, Duplicator Pro expanded its compatibility to include several cloud storage platforms, such as Google Drive, Dropbox, OneDrive, Amazon S3, Backblaze B2, Wasabi, Google Cloud, DreamObjects, Vultr, DigitalOcean Spaces, and Cloudflare R2. Connecting Duplicator Pro to any of these services is straightforward: simply add a new storage location in the plugin and authorize access to your cloud account.
Here’s a general overview of how the connection process works:
- Pick a cloud storage service: Choose based on your storage needs and budget. For instance, Google Drive offers 15 GB of free storage, with upgrades starting at $1.99/month for 100 GB, while Google Cloud storage starts at $0.0012/GB per month.
- Install and activate the plugin: Make sure the plugin supports the cloud service you’ve selected, then head to the settings to connect to the cloud.
- Authorize access and set a backup folder: Log in to your cloud account, grant the necessary permissions, and specify the folder where backups will be stored.
- Test the connection: Verify that backups are successfully uploaded to your cloud account.
Once connected, don’t forget to secure your backups to prevent unauthorized access.
How to Secure Your Cloud Backups
Protecting your cloud backups is essential to avoid costly breaches. Here are some key steps to enhance their security:
- Enable encryption: Ensure that your backup files are encrypted both during transfer and while stored. Check your plugin’s settings to confirm this feature is active.
- Use multi-factor authentication (MFA): Add an extra layer of security to your cloud storage accounts beyond just passwords.
- Create strong, unique passwords: Use a password manager to generate and store complex passwords for your backup tools and cloud accounts.
- Review sharing settings: Regularly check your cloud storage permissions to ensure backup folders aren’t accidentally shared publicly.
- Store backups in different locations: Many cloud providers offer geographically diverse data centers for added redundancy.
- Set up alerts: Configure notifications for suspicious activities or potential breaches in your cloud accounts.
- Conduct regular audits: Periodically test your restore process and evaluate your security measures. With 93% of enterprises reporting downtime costs exceeding $300,000 per hour, securing your backups is a smart investment.
Step 5: Test Your Backups Work
Backing up your WordPress site is just the first step in safeguarding it. The real challenge lies in ensuring that those backups can be restored quickly and completely when disaster strikes. Without proper testing, you might find out too late that your backups are incomplete or corrupted.
Testing your backups regularly is crucial for several reasons. It ensures your data is properly backed up and ready to restore during emergencies like crashes or security breaches. It also helps you build a reliable recovery plan, minimizing downtime and identifying potential issues before they escalate. Considering that over 75% of data loss is caused by human error, testing is essential to avoid the nightmare of rebuilding your website from scratch. This step is the final piece in validating your overall backup strategy.
How to Check Backup Files
Once your backups are configured, the next step is to confirm they’re complete and functional. Here’s how you can do that without putting your live website at risk:
- Review backup logs: Most backup plugins generate logs that indicate whether the backup was completed successfully or if errors occurred. Reviewing these logs can help catch problems early on.
- Check file integrity: Use file integrity monitoring tools to detect any unauthorized changes. This ensures your backups accurately reflect your website’s correct state.
- Test in a staging environment: A staging site provides a safe space to test backups without affecting your live website. This is an effective way to verify that everything works as expected.
- Set up a local testing environment: For manual backup testing, tools like Local or DevKinsta can help. This involves uncompressing the backup file, creating a new database (with credentials matching your
wp-config.phpfile), importing the database backup, and uploading your WordPress files to the local environment. - Use plugin features: Some plugins, like BlogVault, include a test restore option that creates a controlled environment for testing.
Testing the Restore Process
Once you’ve verified your backup files, it’s time to test the restore process. This step ensures that your backups will perform as expected in an actual emergency.
"Testing your backups before restoring could save you from a lot of distress in future. It’s recommended that you make testing an integral part of your overall backup strategy." (WPExplorer.com)
To keep things running smoothly, test your backups on a regular schedule. For example:
- Test immediately after setting up a new backup system or making changes to your backup process.
- Conduct monthly tests to catch issues early.
- Always test after major updates to WordPress core, themes, plugins, or your server environment.
- If you’re restoring an older backup, test it first to confirm it still works as expected.
Here’s a step-by-step guide to testing the restore process:
- Choose a recent backup file and restore it in your staging environment. Monitor the process for any errors.
- After the restoration is complete, thoroughly check the staging site. Test page loading, plugin functionality, form submissions, and database connections to ensure everything works as it should.
The importance of proper testing becomes clear in real-life scenarios. Jerri Williams, a retired FBI Special Agent, experienced a hack on her WordPress site. Thanks to UpdraftPlus’s automated backups and her familiarity with the restoration process, she restored her entire site in under 30 minutes. This quick recovery prevented downtime, avoided audience disruption, and saved years of work – all without needing to rebuild the site from scratch.
Finally, document your testing results. Keep track of successful tests, note any issues, and record how long the restoration process takes. This data helps refine your backup strategy and ensures you’re prepared for emergencies. By testing regularly, you strengthen your site’s resilience and ensure peace of mind.
Conclusion: Keep Your Site Safe with Automatic Backups
Automatic backups are a must-have for safeguarding your WordPress site. In today’s digital world, having a dependable backup system is more crucial than ever.
The five steps outlined earlier create a solid safety net for your website. Each one complements the other, working together to keep your site secure without the need for constant manual effort. This layered approach ensures your site can bounce back when it matters most.
Consider this: about 60% of companies that lose their data are expected to shut down within six months of a disaster. On the flip side, nearly 70% of businesses that experience data loss or breaches recover within hours if they have reliable backups in place.
Automatic backups take the guesswork out of data protection by eliminating manual errors. Whether it’s a crash, plugin failure, or a hack, these backups make it easy to restore your site after unexpected issues like failed updates or accidental mistakes. Beyond just saving your content, they also protect customer data, uphold your online reputation, and maintain user trust.
Over time, automatic backups help reduce downtime, ensure a smooth user experience, and prevent losing customers. They also simplify tasks like website migrations and give you the freedom to test updates, knowing you can quickly roll back if something goes wrong.
Start your backup strategy today to protect your website, your customers, and your online reputation.
FAQs
How can I keep my WordPress backups safe from unauthorized access?
How to Keep Your WordPress Backups Secure
Protecting your WordPress backups is essential to safeguarding your website’s data. Here are a few effective strategies to ensure your backups remain secure:
- Encrypt your backups: Always use a backup tool that includes encryption. Encryption makes your data unreadable without the proper key, adding an extra layer of security even if someone manages to access the files.
- Store backups in different locations: Don’t rely on just one storage option. Save copies of your backups in secure cloud services like Google Drive or Amazon S3, and also on external drives. This way, even if one location is compromised, your data remains safe elsewhere.
- Keep WordPress updated: Regularly update your WordPress installation, plugins, and themes. Updates often include fixes for security vulnerabilities that could put your backups at risk.
By following these steps, you can greatly minimize the chances of unauthorized access and keep your backups safe from potential threats.
What should I look for in a cloud storage service for backing up my WordPress site?
When selecting a cloud storage service for your WordPress backups, it’s essential to focus on a few critical factors to ensure your data stays secure and accessible.
Cost is often the first consideration – make sure the service fits your budget, especially when it comes to recurring fees. At the same time, think about scalability. As your site grows, your storage needs will likely increase, so choose a service that can expand with you.
Security is non-negotiable. Look for features like encryption and secure access options to safeguard your data. Equally important is backup frequency. Whether you need real-time, daily, or weekly backups depends on how often your site changes. And don’t underestimate recovery speed – quick access to your backups can make all the difference in an emergency.
Lastly, consider how well the service integrates with WordPress and your existing backup tools. Seamless integration ensures smoother, automated processes, so you can focus on running your site without extra hassle. By weighing these factors, you can pick a cloud storage service that keeps your WordPress site safe and running smoothly.
How often should I check my WordPress backups to make sure they work properly?
It’s wise to check your WordPress backups at least once a month to make sure they’re functioning properly. If your website sees frequent updates – like adding new content, installing plugins, or making design tweaks – testing your backups weekly might be a better approach. Regularly verifying your backups ensures they’re dependable and ready to restore at a moment’s notice, helping you safeguard your site against unexpected data loss.