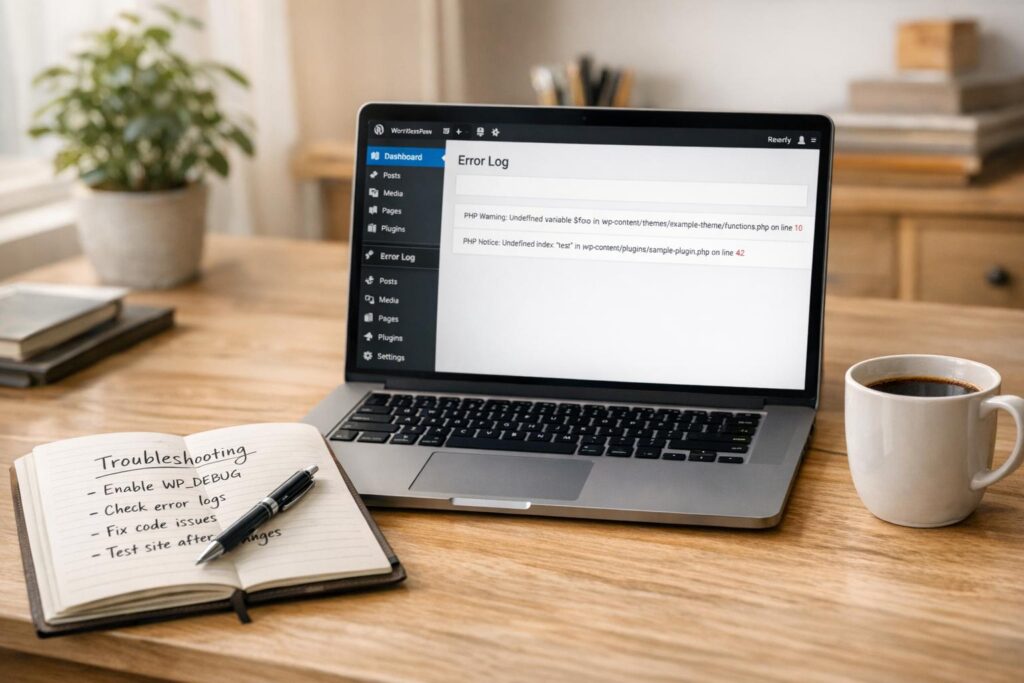
If you’re running into issues on your WordPress site and need to troubleshoot, enabling PHP error reporting is a key step. This process helps identify problems in your site’s code by displaying or logging errors, warnings, and notices. Here’s a quick summary of how to do it:
- Edit the
wp-config.phpfile: This file is located in your WordPress root directory. - Enable debugging: Add or update the following lines in
wp-config.php:define( 'WP_DEBUG', true ); define( 'WP_DEBUG_LOG', true ); define( 'WP_DEBUG_DISPLAY', false );This setup logs errors to a
debug.logfile in the/wp-content/directory without showing them to visitors. - Use in a staging environment: Avoid enabling debugging on a live site to protect sensitive data and maintain performance.
- Turn off debugging after troubleshooting: Set
WP_DEBUGback tofalseand delete thedebug.logfile.
How to Enable WordPress Debug Logs? (In 2 Minutes!)
WordPress Debug Features Explained

WordPress Debug Constants Quick Reference Guide
WordPress offers three key constants to help you identify PHP errors, log them for review, and manage how they’re displayed. Each serves a distinct purpose, and understanding how they work together can make troubleshooting much simpler.
What WP_DEBUG Does
WP_DEBUG acts as the primary switch for enabling debug mode across your site. By default, it’s set to false in the wp-config.php file, keeping your site error-free in appearance. However, when switched to true, WordPress starts showing all PHP errors, notices, and warnings – not just critical issues like fatal errors that cause the infamous white screen of death.
This constant also flags deprecated functions – features that WordPress plans to phase out in future updates – so developers can update their code accordingly. As noted in the WordPress Developer Resources, “It is strongly recommended that plugin and theme developers use WP_DEBUG in their development environments”.
To ensure proper functionality, avoid quoting boolean values. Use this syntax instead:
define( 'WP_DEBUG', false );
Next, let’s explore how WP_DEBUG_LOG helps you keep a record of these errors for later analysis.
Using WP_DEBUG_LOG to Save Errors
WP_DEBUG_LOG works alongside WP_DEBUG to save all errors to a log file. This feature only activates when WP_DEBUG is set to true. Once enabled, WordPress creates a file named debug.log in your /wp-content/ directory, where it logs every error, notice, and warning.
“WP_DEBUG_LOG is a companion to WP_DEBUG that causes all errors to also be saved to a debug.log log file. This is useful if you want to review all notices later or need to view notices generated off-screen (e.g. during an AJAX request or wp-cron run)”.
Starting with WordPress 5.1.0, you can define a custom file path for the log by assigning a string to the constant. For example:
define( 'WP_DEBUG_LOG', '/tmp/wp-errors.log' );.
Hiding Errors with WP_DEBUG_DISPLAY
The WP_DEBUG_DISPLAY constant lets you control whether error messages are visible on your website’s pages. By default, this is set to true, meaning errors appear in your site’s HTML output. On live sites, it’s wise to set this to false to keep sensitive information hidden.
A good practice is to combine define( 'WP_DEBUG_DISPLAY', false ); with define( 'WP_DEBUG_LOG', true );. This way, you can log errors for review while maintaining a polished appearance for your visitors. Additionally, WordPress automatically suppresses error displays for AJAX, REST, and XML-RPC requests to avoid breaking response formats.
| Constant | Default Value | Function |
|---|---|---|
| WP_DEBUG | false | Activates debug mode and reports all PHP errors, notices, and warnings |
| WP_DEBUG_LOG | false | Saves errors to /wp-content/debug.log or a custom file path |
| WP_DEBUG_DISPLAY | true | Controls whether error messages appear in your site’s HTML output |
Finding and Backing Up wp-config.php
Before tweaking the debug settings in wp-config.php, it’s crucial to know where the file is located and to create a backup. You’ll find wp-config.php in your WordPress root directory, typically alongside folders like wp-content, wp-admin, and wp-includes. This file is essential for enabling PHP error reporting, so handle it with care.
Where to Find wp-config.php
You can access wp-config.php using tools like FTP/SFTP, SSH, or your hosting provider’s File Manager. FTP/SFTP clients, such as FileZilla, allow you to visually navigate your server, download the file to your computer for editing, and then upload it back. For those comfortable with command-line tools, SSH access provides a way to edit the file directly using editors like nano or vim. Alternatively, many hosting providers include a File Manager in cPanel or similar dashboards, letting you edit files directly in your browser.
Keep in mind that the root directory might be labeled as public_html, public, or httpdocs.
| Access Method | Tool Examples | Best For |
|---|---|---|
| SFTP/FTP | FileZilla, Cyberduck | Users who prefer a visual interface and local editing |
| SSH | Terminal (Mac/Linux), PuTTY (Windows) | Advanced users who need quick, direct server access |
| File Manager | cPanel, Plesk, Hosting Dashboards | Users who want to avoid installing extra software |
Once you’ve located wp-config.php, make sure to back it up securely to prevent any potential issues.
Creating a Backup Copy
Always back up wp-config.php before making any changes. Even a small syntax error can break your site, leading to issues like the White Screen of Death or database connection errors.
To create a backup, use FTP/SFTP to right-click on wp-config.php and select “Download.” Alternatively, use your hosting provider’s File Manager to download the file. This backup will act as your safety net, allowing you to restore the original file quickly if anything goes wrong.
sbb-itb-f80d703
How to Enable PHP Error Reporting
This guide explains how to use debug constants in your wp-config.php file to enable PHP error reporting in WordPress. To get started, open the wp-config.php file using FTP/SFTP, SSH, or a File Manager. Look for the section where WordPress constants are defined. Be sure to place all debugging constants before the line that says /* That's all, stop editing! Happy blogging. */ (or “Happy publishing”).
Turning On WP_DEBUG
In your wp-config.php file, find this line:
define( 'WP_DEBUG', false ); Change false to true, so it looks like this:
define( 'WP_DEBUG', true ); If the line isn’t already there, add it right above the “stop editing” comment. This activates WP_DEBUG, allowing WordPress to display PHP errors, notices, warnings, and alerts for deprecated functions.
Important: Use boolean values (true or false) without quotes. For example, writing 'false' (with quotes) will be interpreted as a non-empty string, which unintentionally enables debug mode. Once you’ve made the changes, save the file and upload it back to your server if you edited it locally.
Setting Up WP_DEBUG_LOG
To log errors without showing them to visitors, add this line immediately after the WP_DEBUG line:
define( 'WP_DEBUG_LOG', true ); This creates a debug.log file in the /wp-content/ directory where errors will be logged.
If you want to hide errors from being displayed on the site, include these lines:
define( 'WP_DEBUG_DISPLAY', false ); @ini_set( 'display_errors', 0 ); These settings ensure errors are logged privately while keeping them invisible to your visitors. This is especially helpful for troubleshooting without disrupting the user experience.
Other Debug Settings You Can Use
WordPress provides additional constants to fine-tune your debugging setup. For example:
- Force non-minified scripts and styles: Add this line to load the “dev” versions of core CSS and JavaScript files, which can help when testing script modifications or diagnosing layout issues:
define( 'SCRIPT_DEBUG', true ); - Track database queries: Use this setting to store all database queries in the
$wpdb->queriesarray. While helpful for analyzing database performance, it can slow down your site, so disable it when you’re done troubleshooting:define( 'SAVEQUERIES', true );
Here’s a quick reference table for commonly used debug constants:
| Constant | Default | Purpose |
|---|---|---|
WP_DEBUG | false | Enables or disables WordPress debug mode |
WP_DEBUG_LOG | false | Logs errors to a debug.log file in the wp-content folder |
WP_DEBUG_DISPLAY | true | Controls whether errors are shown in the HTML of the page |
SCRIPT_DEBUG | false | Forces WordPress to use development versions of core JS/CSS files |
SAVEQUERIES | false | Logs database queries for performance analysis |
“It is strongly recommended that plugin and theme developers use WP_DEBUG in their development environments.” – WordPress Developer Resources
Always remember to turn off debugging on live sites once you’re done troubleshooting. Leaving debug mode enabled on a production site could expose sensitive details about your PHP code, creating potential security risks.
Turning Off Debug Mode When Done
Once you’re finished troubleshooting, it’s important to turn off debug mode. Leaving it enabled on a live site can expose sensitive information, such as server file paths, database details, and potential code vulnerabilities. This creates unnecessary security risks.
Debug mode can also negatively impact performance. It can slow down your site and quickly consume disk space. For example, if WP_DEBUG_LOG remains active, the debug.log file will keep growing. WP Rocket warns, “If you don’t set WP_DEBUG to false again, the debug file could easily grow in size very fast”. Additionally, constants like SAVEQUERIES can drain server resources by logging every database query into memory.
To ensure your site runs smoothly and securely, follow these steps to disable debug mode and clean up any leftover debug files.
Setting WP_DEBUG Back to False
Open your wp-config.php file and locate the line where you enabled debug mode. Change it back to:
define( 'WP_DEBUG', false ); Make sure to also set WP_DEBUG_LOG, WP_DEBUG_DISPLAY, SCRIPT_DEBUG, and SAVEQUERIES to false. Remember, these should be boolean values without quotes – writing 'false' (with quotes) will keep debug mode active. Once you’ve made these changes, save the file and upload it back to your server.
For added security, take a moment to remove any debug log files from your site.
Removing Debug Log Files
Using FTP, SFTP, or your hosting File Manager, navigate to the /wp-content/ directory and delete the debug.log file. WP Staging highlights the importance of this step: “Otherwise, unauthorized persons could access that file and would be able to get sensitive information from your server”.
If you want to keep the log for future reference, download it to your local computer first and then delete it from the server. Old log files not only take up valuable disk space but also leave sensitive information exposed unnecessarily.
Conclusion
Wrapping up, let’s highlight some essential debugging practices to keep your WordPress site secure and running smoothly. Enabling PHP error reporting is a powerful way to identify and resolve issues that could otherwise compromise security or slow down your site. By uncovering hidden PHP notices, warnings, and outdated code, debug mode helps you address potential problems before they escalate. As noted by WordPress Developer Resources:
“Showing all PHP notices and warnings often results in error messages for things that don’t seem broken… the resulting code is almost always more bug-resistant and easier to maintain”.
However, managing debug settings requires caution. Debug mode should never remain active on live sites. Not only can it expose sensitive information, but it can also negatively impact site performance. WordPress.com emphasizes this point:
“To prevent performance issues and keep sensitive information secure, it’s important to disable debugging mode in your production environment after you’ve finished debugging”.
Leaving errors exposed can reveal server paths and other sensitive data, while active logging can quickly fill up disk space and degrade performance.
Once you’ve completed troubleshooting, disable WP_DEBUG and delete the debug.log file to protect your live environment. For ongoing development, it’s smarter to work in a staging or local environment. This approach keeps sensitive information private and ensures your live site remains optimized for users.
FAQs
Why shouldn’t I enable debugging on a live WordPress site?
Enabling debugging on a live WordPress site comes with serious risks. It could expose sensitive error details, like file paths or database information, to visitors – potentially giving malicious users an opportunity to exploit your site.
On top of that, debugging can drag down your site’s performance and create massive log files that eat up server storage in no time. Because of these issues, it’s much safer to enable debugging only on a staging or development site, where it won’t interfere with your live environment.
How do I access and edit the wp-config.php file in WordPress?
To edit the wp-config.php file in WordPress, here’s what you need to do:
- Connect to your site: Use an SFTP client like FileZilla, SSH, or your hosting provider’s file manager to access your WordPress files.
- Locate the file: Head to the root directory of your WordPress installation. This is usually labeled as
public_htmlor/var/www/html. You’ll find thewp-config.phpfile here, alongside directories likewp-contentandwp-admin. - Edit the file: Open the file with a plain-text editor such as Notepad++ or Visual Studio Code. If you’re working directly through a file manager or terminal, make your changes before the line that says,
/* That's all, stop editing! Happy publishing. */. - Save and upload: After making your edits, save the file. If you downloaded it for editing, upload it back to the same directory. Ensure the file permissions are set to
644or follow your host’s specific requirements.
Once you’ve updated the file, refresh your website or check your WordPress dashboard to verify everything is functioning properly. Be extra careful when modifying this file – any mistakes could disrupt your site’s performance.
What should I do after troubleshooting PHP errors in WordPress?
Once you’ve tackled and fixed the PHP errors, it’s time to tidy up and secure your site. Start by reviewing the error log to confirm all issues have been resolved. Then, thoroughly test your site to make sure everything is functioning as expected.
Next, turn off debugging by editing the wp-config.php file. Set WP_DEBUG to false to stop unnecessary logging and safeguard sensitive information. Once debugging is disabled, remove or archive the debug.log file. This step is crucial to prevent the file from being accessed by visitors or growing uncontrollably over time.
Finally, create a new backup of your site that includes both the files and the database. This backup will serve as a reliable restore point that reflects your site’s fixed and updated state. To make future troubleshooting easier, consider documenting the issue and the steps you took to resolve it. This record can save you time down the road.