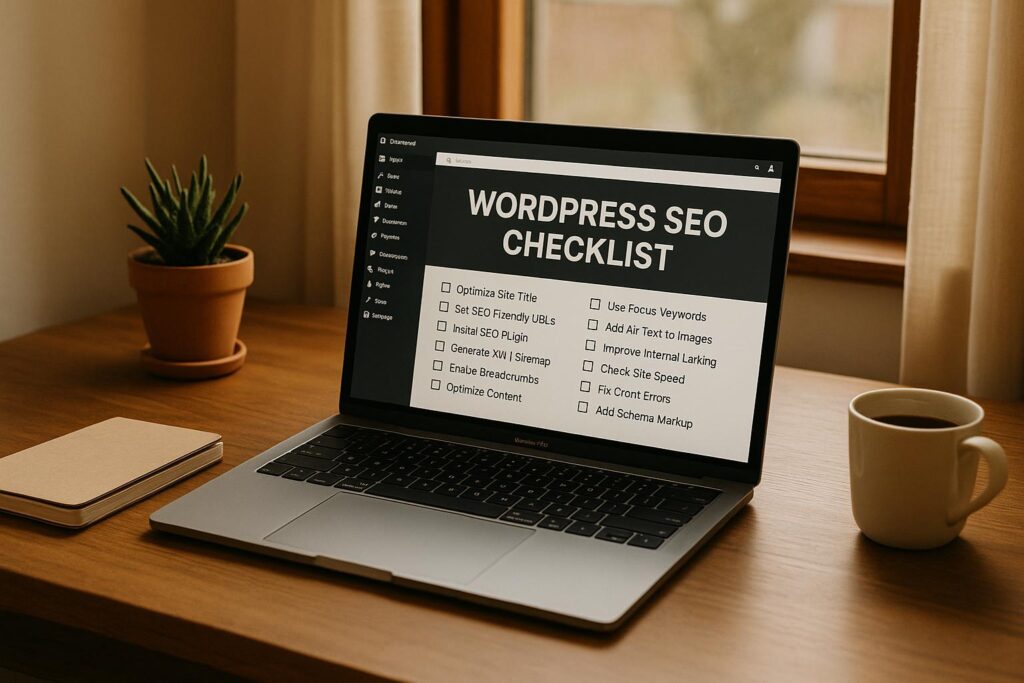
Getting your WordPress site to rank on search engines requires more than just good content. Here are 12 actionable steps to improve your site’s visibility, boost rankings, and attract more visitors:
- Pick an SEO-Ready Theme: Choose a lightweight, mobile-friendly theme with clean code for faster loading and improved usability.
- Set Up an SEO Plugin: Use tools like Yoast SEO or All in One SEO to manage meta tags, sitemaps, and schema markup.
- Configure Permalinks: Use short, keyword-rich URLs for better readability and SEO performance.
- Make Your Site Mobile-Friendly: Ensure your site works seamlessly on smartphones and tablets, as over 60% of web traffic comes from mobile.
- Speed Up Your Site: Use caching plugins, compress images, and remove unnecessary scripts to improve load times.
- Secure Your Website: Keep WordPress updated and enable SSL to protect your site and maintain trust with search engines.
- Structure Your Content: Use proper headings, categories, and tags to organize content for both users and search engines.
- Optimize Meta Titles and Descriptions: Write unique, keyword-focused meta tags to improve click-through rates.
- Add Internal and External Links: Link to relevant pages on your site and trusted external sources to improve authority and navigation.
- Submit an XML Sitemap: Use an SEO plugin to generate a sitemap and submit it to Google Search Console for better indexing.
- Optimize Images: Add descriptive alt text, use proper file names, and compress images to improve site speed and accessibility.
- Ensure Your Site Can Be Indexed: Check WordPress visibility settings and configure your robots.txt file to guide search engine crawlers.
These steps are simple yet impactful for improving SEO and driving organic traffic. Start implementing them today to see measurable results in rankings and user engagement.
WordPress SEO: The Complete Guide
1. Pick an SEO-Ready WordPress Theme
Your WordPress theme sets the stage for your site’s SEO. A poorly designed theme can slow down your site, make it harder to use on mobile devices, and even block search engines from properly crawling your pages. On the other hand, a well-designed theme gives you a head start on SEO, even before you publish your first post.
When choosing a theme, focus on clean coding and fast loading speeds. These elements create a solid SEO foundation that benefits both your users and search engines. Mobile performance, which we’ll dive into in Section 1.1, is another critical aspect to consider.
Why does clean code matter? Themes built with valid HTML, CSS, and JavaScript make it easier for search engines to crawl your site. This can improve loading times and boost your rankings. Plus, a clean codebase reduces security risks and ensures your site runs reliably by avoiding unnecessary scripts or bloated features.
To check a theme’s coding quality, use tools like themecheck.info. Upload the theme’s zip file to identify potential security issues or coding errors. Stick to themes that follow best practices and steer clear of those loaded with excessive scripts that can slow your site.
1.1 Make Sure Your Theme Works on Mobile
Mobile usability is non-negotiable. In 2022, mobile devices accounted for 59.72% of global web traffic. If your theme doesn’t work well on smartphones and tablets, you risk alienating a significant chunk of your audience.
Testing mobile performance goes beyond resizing your browser window. Start with Google’s Mobile-Friendly Test to get Google’s perspective on your site’s mobile usability. This tool can also flag issues that might hurt your search rankings.
For a deeper dive, use your browser’s responsive design mode to simulate different screen sizes. Test your theme on various smartphones and tablets, checking both portrait and landscape views. Make sure text, buttons, and images adjust properly. Tools like Responsinator or BrowserStack can help with advanced testing.
1.2 Focus on Speed and Performance
Speed is crucial for SEO. Search engines reward fast-loading sites, and visitors are more likely to leave if a page takes too long to load. A lightweight, efficient theme is your best bet for maintaining both speed and usability.
Look for themes designed to load only the essentials – CSS and JavaScript that are actually needed. Avoid themes packed with unnecessary fonts, animations, or graphics that add bulk without improving user experience. Tools like Google PageSpeed Insights or GTmetrix can help you test a theme’s speed on a staging site loaded with realistic content.
Be cautious with themes that prioritize aesthetics over performance. Heavy graphics and complex animations may look great but can severely slow down your site. Check reviews and support forums for feedback on speed issues, and stick to themes from trusted developers who focus on efficiency and clean coding.
Once you’ve selected an SEO-ready theme, the next step is setting up essential SEO plugins to further fine-tune your site’s performance.
2. Set Up an SEO Plugin
SEO plugins are a game-changer for WordPress optimization, especially when it comes to handling technical tasks that would otherwise require coding skills. WordPress doesn’t come with built-in tools for things like optimizing meta tags, generating sitemaps, or adding structured data. This is where SEO plugins step in, offering user-friendly interfaces to simplify these tasks so you can focus on creating great content.
Plugins like Yoast SEO, All in One SEO, and Search Atlas Premier SEO Plugin make life easier by automating tasks like managing meta tags, generating XML sitemaps, and adding structured data.
2.1 Key Plugin Features to Use
When choosing and using an SEO plugin, focus on features that will make the biggest difference in your site’s optimization:
- On-page SEO analysis tools: These tools provide real-time feedback to help you optimize meta descriptions, title tags, headings, and keyword usage while you’re creating content.
- Sitemap management: Automatically generate XML sitemaps to help search engines easily crawl and understand your site structure.
- Schema markup: Add structured data to your site so search engines can display enhanced search result snippets, which can boost click-through rates.
- Technical SEO tools: These features handle backend tasks like managing robots.txt files, canonical URLs, and redirects, ensuring search engines can crawl, index, and rank your site efficiently.
2.2 Initial Plugin Setup
Getting started with an SEO plugin is straightforward, thanks to setup wizards that guide you through the basics:
- Connect to Google Search Console: This integration provides insights into your site’s search performance, highlights crawling issues, and simplifies sitemap submission.
- Set up title tag and meta description templates: Configure templates for posts, pages, categories, and tags to maintain consistency across your site. Most plugins let you use variables like your site name, post title, or category to auto-fill these fields.
- Generate and submit an XML sitemap: Enable sitemap creation for your main content types and exclude anything that doesn’t add value for search engines.
- Configure breadcrumbs: If your theme supports breadcrumbs, enable them to improve user navigation and help search engines better understand your site’s hierarchy.
- Review schema markup settings: Many plugins enable basic schema types by default, but you can customize these settings for specific content like e-commerce products, local businesses, or news articles.
With the plugin set up, you’re ready to move on to creating SEO-friendly permalinks.
3. Configure Your Permalinks
Permalinks are the permanent URLs for your WordPress posts and pages. These URLs are more than just links – they help search engines understand your content and influence how your pages rank. A well-structured permalink gives both users and search engines a clear idea of what to expect from your page.
WordPress provides several options for setting up permalinks, but some default formats can be confusing. For example, the default setting might create a URL like yoursite.com/?p=123, which tells you nothing about the page’s content.
The best permalinks are short, easy to remember, and include relevant keywords. Ideally, they should describe your content clearly without being too long. Research shows that top-ranking URLs tend to average around 59 characters, striking a balance between being descriptive and concise.
When it comes to SEO, shorter and keyword-focused URLs are the way to go. Google highlights the importance of clear URLs, stating:
"URLs with words that are relevant to your site’s content and structure are friendlier for visitors navigating your site."
Your permalink structure directly impacts how search engines crawl and index your pages. Including keywords in your URLs helps search engines quickly identify your content’s topic, which can improve your rankings. One highly effective way to optimize your permalinks is to use the Post Name structure, which we’ll explore next.
3.1 Use the ‘Post Name’ Structure
The ‘Post Name’ structure is considered the go-to option for WordPress SEO. It creates clean, descriptive URLs based on your post title. For example, instead of a cryptic link like yoursite.com/?p=456, you’ll get something like yoursite.com/wordpress-seo-tips. To enable this, go to Settings → Permalinks in your WordPress dashboard, select Post name, and click Save Changes. This simple tweak transforms your URLs into user-friendly, keyword-rich links that search engines love.
This structure uses the %postname% tag, which generates a simplified version of your post title. Including your target keywords in the URL is still important for relevance and better indexing. Keep your URLs short – longer ones tend to carry less weight in search engine algorithms.
If your site has a complex setup with multiple categories, you might consider adding categories to your URLs. However, for most WordPress sites, the straightforward Post Name structure strikes the perfect balance between SEO benefits and ease of use.
Important: Changing permalinks on an existing site requires careful planning. Before making any changes, back up your site and set up 301 redirects to maintain your SEO rankings. Without redirects, you risk breaking existing links and losing traffic. Once you’ve updated your permalinks, don’t forget to resubmit your sitemap to search engines to ensure they index your new URLs correctly.
4. Make Your Site Mobile-Friendly
Making your WordPress site mobile-friendly is no longer optional – it’s a must. With over half of all web traffic coming from mobile devices, Google has shifted to mobile-first indexing. This means Google primarily evaluates the mobile version of your site to determine its rankings. If your website isn’t optimized for mobile, you’re not just inconveniencing visitors – you’re also risking lower search rankings.
A responsive WordPress theme is a good start since it automatically adjusts to different screen sizes. But don’t stop there. Make sure every part of your site – forms, images, navigation menus, and popups – works smoothly on smartphones and tablets. Mobile users expect fast load times and easy navigation, and any frustration, like slow pages or hard-to-click elements, can increase bounce rates and hurt your rankings.
Mobile optimization isn’t just about SEO; it also affects your site’s performance with users. Mobile-friendly sites tend to have higher engagement, longer visit durations, and better conversion rates. When people can effortlessly browse, fill out forms, or make purchases on their phones, they’re more likely to take the actions you want.
4.1 Test Mobile Usability
To ensure your site performs well on mobile devices, use Google’s PageSpeed Insights. This free tool evaluates your website and provides detailed performance scores for both mobile and desktop, along with actionable recommendations. For example, it flags issues like text that’s too small, buttons that are too close together, or content that doesn’t fit properly on smaller screens.
Here’s how to get started: Enter your website URL into PageSpeed Insights, and review the report. It’ll highlight problem areas and suggest fixes to improve mobile usability.
For specific features, tools like WPForms can help you create mobile-friendly contact forms, while SeedProd offers flexible landing page templates. If you’re using popups, OptinMonster has over 75 mobile-optimized designs to choose from.
Finally, don’t rely solely on automated tools. Regularly test your site on actual mobile devices, especially after making design changes or adding new plugins. Real-world testing often uncovers issues that tools might miss. By staying proactive, you’ll keep your site mobile-ready and maintain strong SEO performance.
5. Speed Up Your Site
Speed isn’t just about making your site more enjoyable to browse – it’s a key factor in SEO and directly affects how well your site ranks in search results. A faster site keeps visitors engaged and reduces bounce rates. In fact, bounce rates jump by 32% when load times increase from 1 to 3 seconds. WordPress sites often slow down due to bloated themes, too many plugins, and unoptimized media files. On average, the top-ranking sites on Google load in just 1.65 seconds. Meanwhile, 40% of users will abandon a site if it takes longer than three seconds to load. Clearly, optimizing your site’s speed is a must for both search rankings and user retention.
5.1 Use Caching Plugins
Caching plugins simplify your site by creating static HTML versions of your pages, allowing them to load instantly instead of being generated on the fly. This reduces server load and significantly speeds up your site. For example, WP Rocket is a popular choice for beginners, priced at $59 per year for a single site. It offers features like minification, lazy loading, and CDN support, all through an easy-to-use interface. If you’re looking for a free option, W3 Total Cache provides robust caching tools, with a premium version starting at $99 per year.
When setting up a caching plugin, test your site’s load time before and after activation to measure improvements. Be sure to configure cached files to refresh whenever you publish new content, and exclude dynamic pages – like shopping carts – that need real-time updates. Pair caching with media optimization for even better results.
5.2 Compress Your Images
Images often take up the most space on a webpage, so compressing them is a quick way to speed things up. Formats like WebP can reduce file sizes by about 30% compared to JPEG and PNG, without losing quality. Since all major browsers now support WebP, it’s a smart choice for new uploads.
For compressing existing images, tools like TinyPNG and WP Smush are great options. For instance, luxury retailer Shinola cut its page weight by 50%, sped up image rendering by 10–15%, and shaved a full second off page load times after implementing image compression. Similarly, Tinify helped reduce image sizes by over 70%, delivering faster load times.
To get the best results, use JPEG for photos, PNG for graphics with transparency, and WebP or AVIF for modern applications. Always resize images to their display size before uploading to avoid wasting bandwidth. Once your images are optimized, the next step is to streamline your site’s code.
5.3 Remove Unnecessary Scripts
Every plugin and theme adds scripts to your site, and over time, these can pile up and slow things down. Regularly audit your plugins and remove any you’re not using to keep your site lean.
Another way to speed things up is by deferring non-essential JavaScript so it loads after your main content. This ensures visitors can see your page quickly, while background scripts load later. You can also minify CSS and JavaScript to strip out unnecessary characters, reducing file sizes and improving load times. Many caching plugins include minification tools, making this process simple to implement.
After making these changes, use tools like Google PageSpeed Insights to monitor your site’s performance. Removing unnecessary scripts can lead to noticeable improvements in both speed and SEO, while also making your site easier for search engines to crawl.
6. Secure Your WordPress Site
Securing your website is essential – not just to safeguard your data but also to maintain and improve your SEO rankings. Search engines penalize hacked or compromised sites by dropping their rankings or even removing them from search results entirely. A secure site also builds trust with visitors and search engines, making security a key component of your SEO strategy.
WordPress, being widely used, is often targeted by hackers. However, staying updated and using SSL certificates can significantly reduce these risks.
6.1 Keep WordPress Updated
Keeping WordPress updated is one of the simplest yet most effective ways to protect your site. Regular updates include security patches, performance tweaks, and new features, all of which address vulnerabilities that hackers exploit.
"If you’re using an older version of WordPress, your site is vulnerable to attacks. This also applies to any plugins or themes on your website."
- Jen Swisher, Customer Experience Specialist for Jetpack
Before updating, back up your site to ensure you can restore it if anything goes wrong. It’s also a good idea to test updates on a staging site first to avoid compatibility issues affecting your live site.
Updates can be managed through the WordPress dashboard under the Updates section. While minor updates and security patches can be set to update automatically, it’s better to handle major updates manually after testing.
"WordPress gets updated regularly to fix security issues and improve site performance."
- Anurag Changmai
Efficient update management can save you a lot of time. For example, users of Cloudways’ SafeUpdates reported saving over 42 hours of maintenance each month. Before updating, review release notes to check for changes that might require adjustments to your theme or plugins. For plugins, enable auto-updates for those from trusted developers, but keep an eye on your site’s functionality to catch any issues early.
6.2 Enable SSL Certificates
SSL certificates are crucial for securing the data exchanged between your website and your visitors’ browsers. They encrypt sensitive information, preventing it from being intercepted. Beyond security, SSL certificates can also give your Google rankings a boost.
When you enable SSL, your website’s URL changes from "http://" to "https://", and a padlock icon appears in the browser bar. This visual indicator reassures visitors that your site is secure, which can even help reduce bounce rates – a win for your SEO.
Many hosting providers offer free SSL certificates through services like Let’s Encrypt. If your host doesn’t include SSL by default, you can usually request one via your hosting control panel or by contacting support. While premium SSL certificates are available for e-commerce sites needing extra validation, a standard SSL certificate is sufficient for most WordPress sites.
After installing an SSL certificate, update your WordPress settings to default to HTTPS. Go to Settings > General in the admin dashboard to change your site URL. Additionally, update any hardcoded HTTP links in your content and set up redirects from HTTP to HTTPS to avoid duplicate content issues.
It’s also important to monitor your SSL certificate to ensure it remains active. While most certificates auto-renew, technical glitches can sometimes interfere. Use an online SSL checker to verify its status regularly and prevent any potential security or ranking issues.
With your site secured, you’re ready to focus on optimizing your content structure for better SEO results.
sbb-itb-f80d703
7. Structure Your Content Properly
A clear and logical structure benefits both your readers and search engines. By organizing your content effectively, you not only improve user experience but also enhance your site’s search rankings. A well-planned layout keeps visitors engaged and helps search engines prioritize key topics on your page.
When your content flows naturally from one idea to the next, readers can quickly find the information they need. This seamless experience often translates into better SEO performance, as search engines favor sites that keep users engaged. Let’s dive into how proper use of headings and thoughtful categorization can further optimize your content.
7.1 Use Headings Correctly
Headings serve as a roadmap for your content, guiding both readers and search engines. They break up large chunks of text, making your page easier to navigate and understand. Think of headings as the backbone of your content’s structure.
Stick to one H1 tag per page – this should be your main title or headline. It tells search engines the primary focus of your page. From there, use H2 tags for major sections, H3 tags for subsections, and so on. For example, if you’re writing about "WordPress Security Tips", your heading structure might look like this:
- H1: WordPress Security Tips (main title)
- H2: Keep WordPress Updated
- H2: Use Strong Passwords
- H3: Password Manager Tools
- H3: Two-Factor Authentication
- H2: Install Security Plugins
This type of hierarchy not only helps readers scan your content but also signals to search engines which topics are most important and how they relate to one another.
Avoid using headings just for visual appeal. Each heading should introduce a new section or idea. Also, maintain a logical sequence – don’t skip levels (e.g., jumping from H2 to H4 without an H3). This can confuse both readers and search engines.
If you’re using the WordPress block editor, assigning heading levels is straightforward. Simply select the appropriate level from the dropdown menu when adding a heading block. Additionally, many SEO plugins can flag heading structure issues, helping you maintain consistency across your site.
Beyond headings, a well-organized taxonomy is equally important for improving discoverability.
7.2 Organize With Categories and Tags
WordPress categories and tags are essential tools for organizing your content and boosting SEO. They help readers find related posts and make it easier for search engines to understand the relationships between your content.
Categories define your site’s main topics, much like chapters in a book. For instance, if you run a cooking blog, your categories might include "Appetizers", "Main Courses", and "Desserts." Aim to keep your categories focused and manageable – typically, 5 to 10 categories are enough for most sites.
Tags, on the other hand, highlight specific details within your posts. For example, a "Main Courses" post could have tags like "chicken", "30-minute meals", or "gluten-free." Tags allow readers to discover content with particular characteristics they’re interested in.
For cleaner organization, assign each post to one relevant category. While WordPress allows multiple categories per post, sticking to one prevents confusion and avoids duplicate content issues. You can use 5 to 10 tags per post, but don’t overdo it – too many tags can dilute their value and overwhelm readers.
Regularly clean up unused tags and merge similar categories to keep your taxonomy streamlined. This maintenance ensures your site remains easy to navigate and avoids clutter.
A well-organized taxonomy also enhances internal linking opportunities. Grouping related content together makes it easier to link naturally between posts, which helps distribute page authority and keeps visitors on your site longer.
Don’t overlook the potential of category and tag pages themselves. These pages can rank in search results, so treat them as valuable landing pages. Add compelling descriptions and ensure they offer more than just a list of posts to provide real value to your audience.
8. Write Better Meta Titles and Descriptions
Meta titles and descriptions are your content’s first impression in search results. Acting as concise headlines and summaries, they give potential visitors a snapshot of what your page offers. While your theme and plugins handle the technical side, strong meta tags enhance visibility and draw users in.
Meta titles play a direct role in rankings, while meta descriptions significantly impact click-through rates. In fact, unique meta descriptions can increase click-through rates by 5.8% compared to those that are missing or duplicated.
Think of meta tags as your content’s advertising copy. They need to accurately reflect your page while being enticing enough to encourage clicks. Striking this balance between precision and appeal can make the difference between a well-trafficked page and one that’s overlooked.
Over 60% of searchers are more likely to click on a result if the meta description feels relevant and engaging. This highlights how meta tags can directly affect your organic traffic, even if your content ranks well.
While Google sometimes rewrites meta descriptions that are missing, duplicated, or irrelevant, crafting thoughtful meta tags increases the likelihood that your intended message will appear in search results.
To get the most out of your meta tags, ensure they are unique for every page.
8.1 Write Different Meta Tags for Each Page
Every page on your site should have its own distinct meta tags. Duplicating meta titles and descriptions is a missed opportunity to target specific keywords and user intents.
Here are some practical tips for writing effective meta tags:
- Meta Titles: Keep them under 60 characters and start with your primary keyword for better visibility. For instance, instead of "Our Company Blog Post About WordPress SEO Tips for Small Business Owners", opt for something shorter and sharper like "WordPress SEO Tips for Small Businesses | Your Brand."
- Meta Descriptions: Aim for 150–160 characters to ensure the full description displays in search results. Use this space to expand on your title, include secondary keywords naturally, and give users a reason to click. Words like "discover", "learn", or "explore" can encourage engagement.
Most SEO plugins, such as Yoast SEO or All in One SEO, provide fields for customizing meta tags. These tools often include snippet previews so you can see exactly how your page will appear in search results before publishing.
When writing meta tags, keep your target audience in mind. A technical audience might prefer precise language, while a beginner’s guide should use simpler terms. Match the tone and vocabulary your readers are likely to use when searching for your content.
Including your brand name in meta titles is another smart move, especially for key landing pages or your homepage. This not only builds brand recognition but can also improve click-through rates among users already familiar with your site.
Avoid keyword stuffing. While it’s important to include relevant keywords, your meta tags should feel natural and provide genuine value. Clarity and relevance should always take priority over cramming in keywords.
Finally, conduct regular audits of your meta tags. Check for missing, duplicate, or outdated information, and update them as your content evolves or you target new keywords.
Meta tags are often the first interaction users have with your site. Make them count by being clear, honest, and engaging. A well-written meta description can be the nudge a potential visitor needs to click on your link.
9. Add Internal and External Links
Once you’ve set up a clear content structure, the next step is to strengthen your SEO efforts with a solid linking strategy. Links are a core part of SEO, helping your WordPress site perform better in search rankings while improving the user experience. Internal links connect different pages on your site, while external links point to trusted sources outside your website. Together, they create a network that supports both search engines and readers.
Internal links help spread page authority across your site and encourage visitors to explore more content, keeping them engaged longer and reducing bounce rates. External links, on the other hand, show that your content is well-researched by referencing credible sources. Search engines also use links to crawl and index your site, ensuring they can find all your important pages.
Strategic linking isn’t just about navigation – it also builds your site’s authority. Pages with strong internal links keep readers engaged and lower bounce rates. Meanwhile, linking to trustworthy external sources can help search engines see your content as relevant and reliable, which can improve your rankings for competitive keywords.
Here’s how to make the most of both internal and external linking.
9.1 Internal Linking Strategy
A smart internal linking strategy connects related content in a way that benefits both users and search engines. Think of internal links as pathways that guide visitors to your site’s most valuable information. This not only improves navigation but also spreads authority across key pages.
- Use clear and descriptive anchor text so readers know exactly what to expect, like "WordPress security tips" or "SEO for beginners."
- Focus on cornerstone content by linking to your most comprehensive guides or high-value pages to distribute authority effectively.
- Place links naturally within your content, rather than relying on navigation menus or footers. Links embedded in the flow of your text carry more SEO weight.
- In WordPress, you can quickly add internal links by highlighting text, clicking the link icon, and selecting a suggested page.
- Audit your internal links regularly. As your site grows, update older articles with links to newer content and connect fresh posts to existing pages. This keeps your internal linking structure strong.
- Avoid overloading your content with links. Too many links can overwhelm readers and reduce the impact of each one.
9.2 External Linking Best Practices
External links to authoritative sources can boost your content’s credibility and improve your SEO. Here’s how to get it right:
- Link to trusted, high-authority sites. In the WordPress and SEO world, examples include resources like Google’s official guidelines, WordPress.org, or leading SEO blogs. Tools like Moz, Ahrefs, or SEMrush can help you assess site authority.
- Use external links to back up claims or provide additional resources. For instance, linking to Google’s SEO documentation can reinforce your points and show thorough research.
- Set external links to open in a new tab. This keeps visitors on your site while still giving them access to useful external content.
- Use the
rel="nofollow"attribute for sponsored links or sources you’re unsure about. For trusted and relevant sources, standard "follow" links are appropriate and beneficial. - Avoid linking to spammy or low-quality sites. Poor-quality links can harm your site’s credibility and SEO performance. Search engines value quality over quantity when it comes to external links.
- Check your external links regularly to ensure they’re not broken or outdated. Tools like Google Search Console can help you monitor and fix any issues.
- Embed external links naturally within your content. Links should add genuine value rather than being clustered at the end or in a separate resources section.
10. Submit XML Sitemap to Search Engines
Once your linking strategy is in place, the next step is ensuring search engines can efficiently index all your content. This is where an XML sitemap comes into play. Think of it as a guide for search engines, outlining all the pages on your WordPress site and how they’re structured. As your site grows, a well-maintained sitemap becomes even more important for helping search engines find and index new content quickly.
An XML sitemap makes it easier for search engines to crawl your site. Thankfully, modern SEO plugins take care of the heavy lifting by automatically creating and updating sitemaps whenever you publish new content.
"A sitemap makes your WordPress site accessible and easily navigable for search engines."
– Rob Pugh, Jetpack
Here’s how you can generate and submit your sitemap effectively.
10.1 Use an SEO Plugin to Generate Your Sitemap
Most reliable SEO plugins for WordPress come with built-in tools to create and manage sitemaps. For instance, Jetpack offers a straightforward way to handle sitemaps. You can enable the feature by going to Tools → Marketing → Traffic within the plugin. Jetpack automatically generates four types of sitemaps: a general sitemap, a news sitemap, an image sitemap, and a video sitemap. These are updated roughly every 12 hours to ensure your content remains up to date.
Once your SEO plugin is installed and activated, head to its sitemap settings. From there, enable the sitemap feature and adjust any preferences, such as deciding which post types to include. After setting it up, your sitemap should be accessible at a URL like yoursite.com/sitemap.xml. Be sure to review it to confirm that all essential pages are listed.
10.2 Submit Your Sitemap to Google Search Console
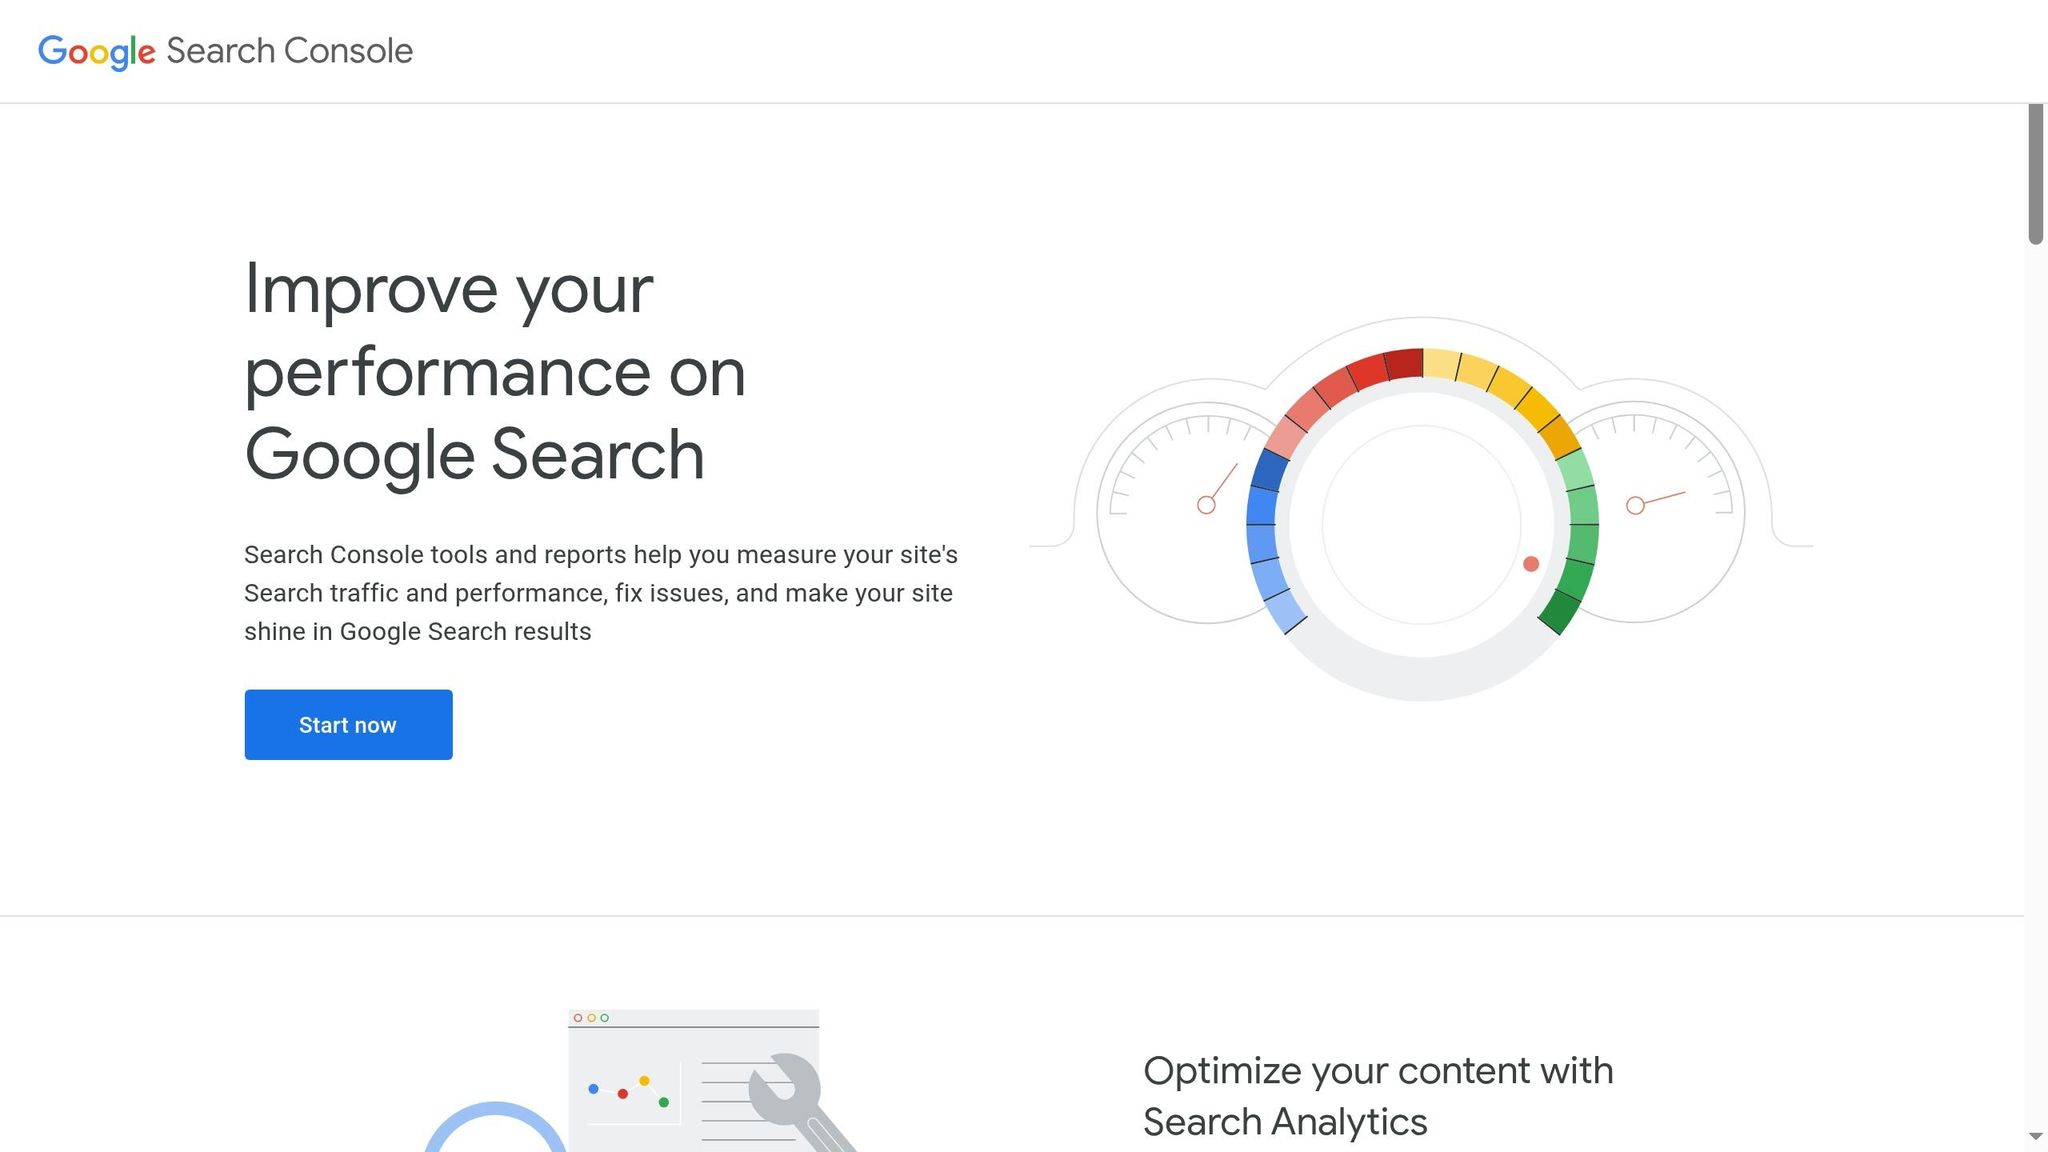
Having a sitemap is just the first step – you also need to submit it to search engines. Google Search Console is the go-to tool for this. If you haven’t already set it up, visit search.google.com/search-console to add your WordPress site as a property. After verifying ownership, navigate to the Sitemaps section, paste your sitemap URL (yoursite.com/sitemap.xml), and click "Submit."
Google will process your sitemap based on its crawl schedule. You can use Search Console to monitor the indexing status and identify any issues that might arise.
Don’t stop with Google – submit your sitemap to other major search engines like Bing using their Webmaster Tools. Regularly checking these tools can help you catch and fix any errors or indexing problems, ensuring your site remains search-engine friendly.
11. Optimize Images for SEO
After addressing speed and performance, fine-tuning your images is another key step to improve both user experience and SEO. Images play a dual role – they not only make your content visually engaging but also help search engines better understand your page. By reducing file sizes and adding meaningful context through alt text and descriptive filenames, you can significantly enhance your site’s performance and search rankings.
11.1 Add Alt Text
Alt text acts as a bridge between your images and search engines, while also aiding users who rely on screen readers or encounter loading issues. For SEO, alt text provides essential context, helping your images appear in relevant search results.
When crafting alt text, aim for descriptions that are clear and concise. Highlight what the image depicts and how it ties into your content. For instance, instead of something generic like "image of food", go for "freshly baked chocolate chip cookies on a cooling rack." This approach not only boosts SEO but also makes your site more accessible.
To add alt text in WordPress, use the Alt Text field in the media library when uploading images. If you’ve already uploaded images without alt text, you can still edit them by selecting the image in the media library and entering the description.
Keep the tone natural – avoid cramming in keywords unnecessarily. While it’s fine to include a keyword if it fits organically, forcing them can harm both usability and SEO. Prioritize accuracy and relevance over keyword density.
Once your alt text is in place, the next step is to ensure your image filenames are just as descriptive.
11.2 Use Descriptive File Names
Before uploading images to WordPress, rename the files using descriptive, keyword-relevant names. This simple habit helps search engines understand your images even before they analyze the alt text or surrounding content.
"Like many other parts of the page targeted for optimization, filenames are best when they’re short but descriptive." – Google
Google uses filenames to gather information about your images, making them an often-overlooked factor in SEO. Instead of uploading files with generic names like "IMG_948392.jpg" or "DSC001.jpg", rename them with clear, concise descriptions that incorporate relevant keywords.
Here are some tips for effective filenames:
- Keep it short and descriptive: For example, "strawberry-ice-cream.jpg" is much better than "IMG_948392.jpg".
- Use hyphens to separate words: Search engines treat hyphens as spaces, so "habanero-hot-sauce.jpg" is more readable than "habanerohotsauce.jpg".
- Include keywords naturally: If your content is about top universities and you have an image of Cambridge University, name the file "Cambridge-University.jpg" instead of something vague like "IMG0001.jpg".
- Avoid overloading with keywords: Keyword stuffing in filenames can appear spammy and hurt your SEO.
Rename your images before uploading them to WordPress, as changing filenames later can be tricky and might disrupt existing image links. Make this a routine part of your workflow when preparing content for your site.
Lastly, align your image naming strategy with your overall content goals. If you’re targeting specific keywords or themes, incorporate them naturally into your filenames. This consistency strengthens the connection between your content and images, making it easier for search engines to understand your page’s focus.
12. Make Sure Your Site Can Be Indexed
Once your images and content are optimized, it’s crucial to ensure search engines can properly access and index your site. Even the most well-optimized website won’t rank if search engines encounter barriers while crawling it. Focus on two key areas: your WordPress visibility settings and the configuration of your robots.txt file.
12.1 Check WordPress Visibility Settings
WordPress includes a feature called "Search Engine Visibility" that determines whether search engines can index your site. To check this setting, head to your WordPress dashboard and navigate to Settings → Reading. In the "Search Engine Visibility" section, look for the checkbox labeled "Discourage search engines from indexing this site".
If this box is checked, uncheck it and click "Save Changes". By doing so, you’re allowing search engines to crawl your site. Keep in mind that it might take some time for search engines to recrawl and index your content.
12.2 Set Up Your Robots.txt File
After confirming your visibility settings, fine-tune how search engine crawlers interact with your site by configuring your robots.txt file. This file, located at yoursite.com/robots.txt, provides instructions to search engine crawlers about which parts of your site they can or cannot access.
The file uses basic directives:
- Allow: Grants crawlers access to specific areas.
- Disallow: Blocks crawlers from accessing certain folders or files.
For most WordPress sites, it’s a good practice to block access to administrative directories (like wp-admin and wp-includes) and staging or development environments. However, avoid blocking essential areas, such as the uploads folder, where your images and media are stored.
Additionally, include a link to your XML sitemap in the robots.txt file to help search engines locate it easily. Add a line like this:
Sitemap: https://yoursite.com/sitemap.xml Keep in mind that robots.txt is a public file – anyone can view it by visiting your domain followed by /robots.txt. It’s not designed to hide sensitive information, so avoid including private data. To ensure your robots.txt file is configured correctly, use tools like Google Search Console’s robots.txt Tester. This will help you verify that important pages aren’t accidentally blocked.
Conclusion
Following the 12 steps outlined in this WordPress SEO checklist lays a strong groundwork for improving your site’s search engine performance. From choosing a fast, mobile-friendly theme to ensuring proper indexing, each step plays a critical role. Together, these strategies enhance your site’s visibility, improve rankings, and create a better experience for your visitors.
The benefits of applying these steps are clear. For instance, a small business blog that fully embraced its SEO checklist – upgrading its theme, optimizing images, and using SEO plugins – experienced a 40% jump in organic traffic within three months. It also saw a 15% drop in bounce rate and longer session times, proving the value of a structured approach.
SEO is not a one-and-done task. It’s essential to revisit and update your checklist regularly, especially with major updates or quarterly reviews. Start by analyzing your current performance using tools like Google Analytics and Search Console. These insights provide a baseline to measure your progress and identify areas for improvement.
Optimized websites can reduce bounce rates by 53% and increase conversion rates by 20%. Additionally, well-organized content and properly crafted meta tags can lead to more featured snippet appearances and higher rankings.
Take action now – implement these 12 steps to improve your site’s visibility, rankings, and user engagement.
FAQs
How can I pick a WordPress theme that looks great and is optimized for SEO?
When selecting a WordPress theme that combines great design with strong SEO performance, start with lightweight themes. These themes load quickly, which not only enhances user experience but also boosts your search engine rankings. Ensure the theme is fully responsive and mobile-friendly so your site looks and functions perfectly across all devices. Additionally, opt for a theme with clean, well-organized code and compatibility with popular SEO plugins to make on-page optimization easier. By focusing on both visual appeal and technical functionality, you can build a site that performs well and looks great.
How can I set up an SEO plugin to improve my WordPress site’s search rankings?
To make the most of an SEO plugin on your WordPress site, start by activating essential features like XML sitemaps, meta title and description optimization, schema markup, and canonical URLs. These tools help search engines better interpret and rank your content.
Don’t forget to link the plugin with Google Search Console. This connection provides valuable insights into your site’s performance and indexing status. Keep the plugin updated and periodically review its settings to ensure they align with the latest SEO practices. These steps will set a solid groundwork for boosting your site’s visibility and search rankings.
Why should I regularly review and manage the links on my WordPress site?
Regularly keeping an eye on the links across your WordPress site is a must if you want to maintain strong SEO results and offer visitors a smooth experience. Broken or outdated links can annoy users and hurt your rankings on search engines.
Here’s how you can stay on top of link management:
- Use tools designed to check for broken links and fix them promptly.
- Refresh outdated links or remove ones that no longer make sense.
- Try automated link management plugins to track link health and keep your site running smoothly.
By staying proactive with link maintenance, you’ll boost your site’s trustworthiness and make it more attractive to both users and search engines.